
When we start learning about compression, we also start hearing the terms “Sidechain”, “Parallel” and “Multiband” a lot, but it is usual that, at the beginning, we mix up the terms.
That is why we thought it would be useful to revise these three compression techniques in the same post so you can use it as a quick-reference guide when you need it.
If you think you need to revise basic concepts about compression before continuing reading you can check out this full masterclass on understanding compression, now back to the article
1. Parallel compression
Understanding what it is:
Parallel Compression is the blending of an uncompressed signal with a duplicate of that signal that is compressed:
 Waveform without compression
+

Duplicate of the waveform above with compression
Imagine that… you have a track with some drums, and you are not happy with it because you want these drums to sound more compact and powerful. Therefore, you add a compressor to this track and try to adjust it so the drums sound punchier. However, when you achieve that, you miss the nice dynamic range that some of the elements had before compressing. What can you do then? You can try parallel compression, so you have a mixture of the both versions of the drums, the compressed and punchy one, and the uncompressed and natural sounding one. This way, you can achieve results that you would never achieve by adjusting a compressor in only one signal.
Ways to do it:
- You can duplicate the drums tracks and leave one copy without compression and the other with compression. However, be careful when mixing both tracks in order not to have phase issues. There is an easier way to do this by using a bus or return track:
- Place a compressor in the bus track and set it so it applies a heavy compression (high ratio and threshold and very fast attack), and send your whole drum’s signal to it. Balance the uncompressed signal with the compressed one by using the aux fader of the bus track.
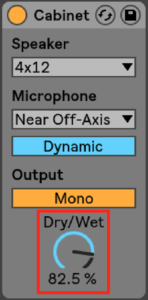
- However, there is even an easier way to do it in some plugins. Some plugins have a DRY/WET KNOB that lets you balance an uncompressed version of your signal with a compressed version. You don’t need to duplicate the signal, the plugin does it for you. So, in our example, we would set the plugin directly into our drums track, and we would balance the parallel compression by adjusting the knob dry/wet. When it is 0%, there is just one not compressed signal, and when it is 100%, there is just one compressed signal. Anything in the middle means there is a balance between two signals, a compressed one and an uncompressed one.
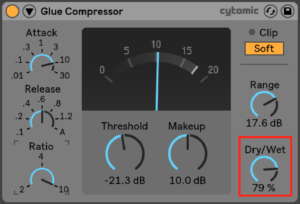
In fact, you will see this dry/wet knob in many other plugins, because parallel processing is a technique you can apply with any effect. Remember to set the dry/wet knob of the effects to 100 % when using them in a return track:
2. Sidechain compression
Understanding what it is:
Sidechain is a way to control the compressor with a separate signal than the one which the compression is being applied to.
It is used a lot in electronic music in order to create the pumping style effect that works so well with 4/4 kick drums and legato such strings or sustain basses because of the rhythmic interplay between those elements:
There are 3 essential components required to achieve sidechain compression:
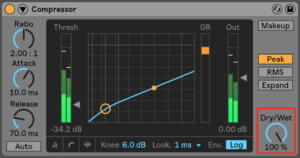
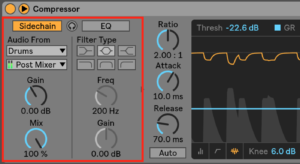
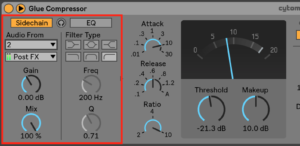
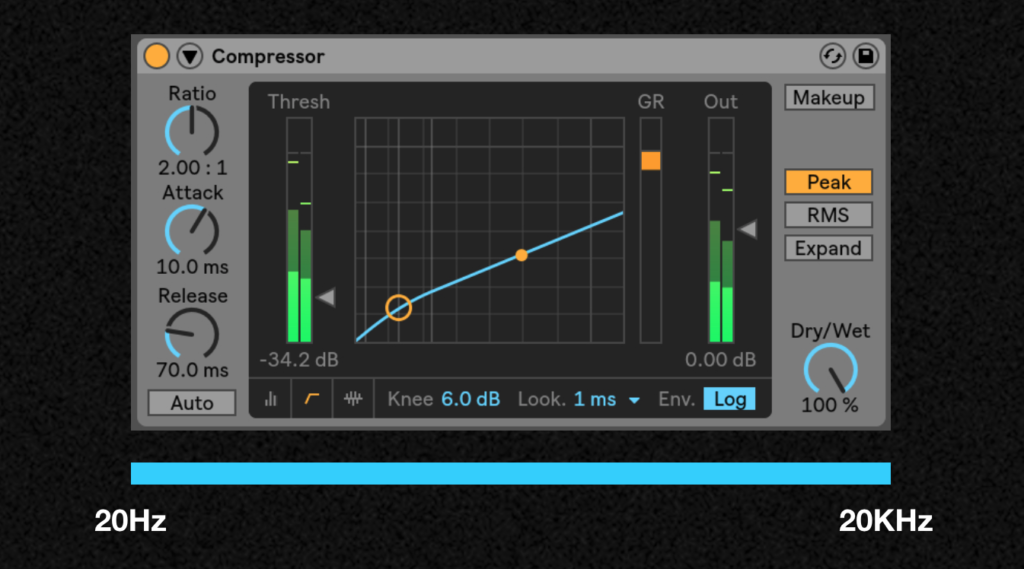
1. A compressor that allows sidechaining. Not all plugins have this option, but it is the case in Ableton Live’s. In fact, you can sidechain with Ableton’s standard Compressor, the Glue Compressor, and the Multiband Dynamics:
2. A main audio signal, the one that will be affected by the compressor.

3. A sidechain signal, the one that triggers the compressor. It will determine when the compression occurs and how it reacts.

Something that is usually misunderstood in sidechaining, is that when you are setting the parameters of the compressor, you are not doing it in relation to the main audio signal, but in relation to the sidechain signal:

(Pic above) The pink audio of the sidechain signal that is crossing the threshold will be triggering the compressor in order to affect the main audio signal
How to do it:
1. Place the compressor in the track of the main audio signal (in the example you will see we place it in the strings track).
2. Turn on the sidechain option (it is hidden in the triangle of the upper left menu).
3. Choose the sidechain signal you want from the “audio from” menu (in the example you will see we choose the kicks).
4. Start adjusting the threshold until you see there is gain reduction, and continue setting the rest of parameters to find the sound you like!
3. Multiband compression
Understanding what it is:
Multiband compression is a technique where multiple compressors are used to compress different frequency bands of a signal individually.
A normal compressor applies the compression to the signal evenly along the whole frequency range of that signal. But with a multiband compressor, you can apply different compression amounts to different frequency bands.
If you want to see some great mixing content from one of the best producers in the industry, you need to check out this free chapter on mixing on Rupert Neve Designs 5088 from techno producer Matador
However, keep in mind that multiband compression is mostly used for mastering to do repairing jobs when the mix is wrong and you do not have access to the stems separately. Or to do some sound design effects otherwise impossible just with one band compressor. We are saying this so you realise it is not an indispensable tool when mixing and it is most times better to use a single band compressor that allows you to have total control over your sound.
How to do it:
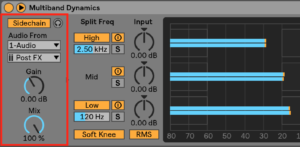
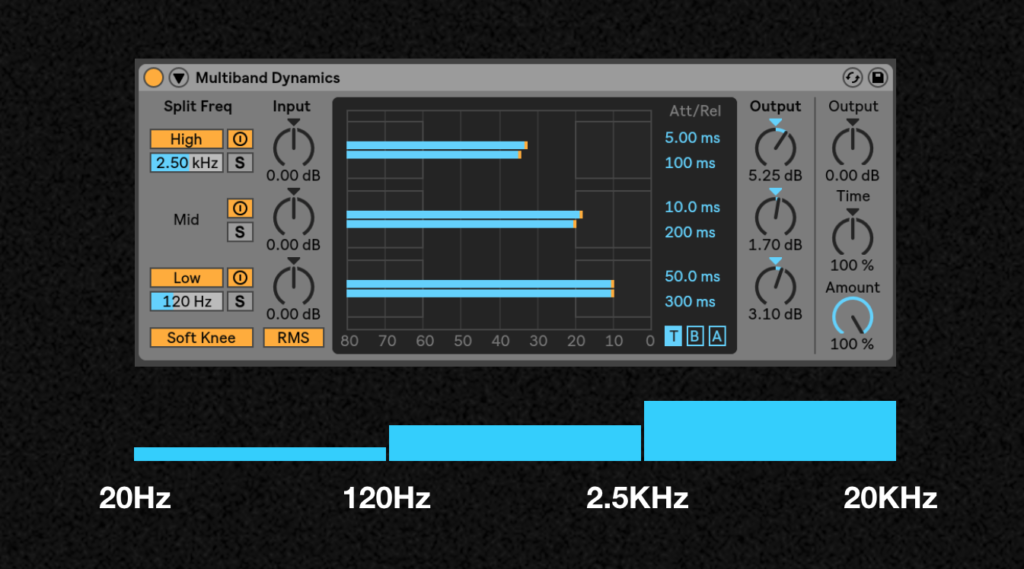
In Ableton Live, the plugin you need to use is the Multiband Dynamics, and it divides your signal up to three frequency ranges
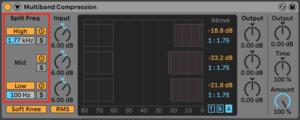
1. Set the different frequency ranges you want to compress. Notice you have solo buttons to hear every band independently, and you can also activate and deactivate every band.
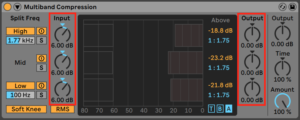
2. Adjust the Input and Output levels if necessary. The Input knobs boost or attenuate the level of each band before it undergoes dynamics processing, while the Output knobs to the right of the display adjust the levels of the bands after processing.
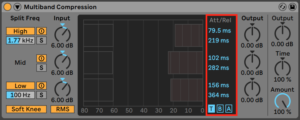
3. Adjust the Attack and Release settings (T edit mode) and the Threshold and Ratio settings (A edit mode), for each band.
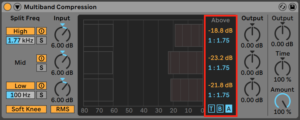
The B edit mode is also to set the Threshold and Ratio, but not in a “downwards” way as it is done in common compression. Instead, it is done in an “upwards” way, which means, reducing the signal’s dynamic range by raising the levels of signals that are below the threshold, instead of pushing down the levels of signals that are above the threshold (which is what normal compression does)
4. Adjust other settings if needed, as you would do with a normal single band compressor.
Questions?
If you have any questions or if you would like us to go in depth with any of these concepts, leave us a comment!


 50 Industry Music Production Tips You Must Know


