
What is audio recording?
When we refer to audio recording, we talk about the process to record any sound. This sound can come from any type of source (musical instrument, human voice or any other source you can imagine). Then, this sound is converted into an electric signal that can be processed by a digital or analog recording system, a console or a computer for example. Acoustic instruments, due to the nature of their sound, will need a microphone to pick up the sound produced. Nonetheless, electric instruments such as keyboards, electric guitars or bass guitars, will need a line to connect the instrument to the computer or recording device.
In order to record a sound to create an audio, many methods can be considered. The most commonly used are multitracking, overdubbing and live recording. Multitracking is used when the whole band or a group of instruments or sources needs to be recorded at the same time. Overdubbing is used when a single instrument or source needs to be recorded on top of already recorded tracks. Last but not least, live recording refers to a recording that is handled in real-time, playing all the instruments at the same time and recorded to a two channel stereo track..
Audio recording technology has evolved significantly over time. A few decades ago, analog recording was the only option available. All audio recordings were converted into an electronic signal that was processed by a tape recorder. Nowadays, analog recording has been replaced by digital recording. Audio interfaces and computers work together to convert the electronic signals recorded by the microphones into a code of 0s and 1s that computers can process and store in their drives. Thanks to this innovation, audio recording has grown into a wide range of different applications outside music production, such as television, broadcasting, video production and many others.
The importance of audio recording in a production
Nowadays, most of the productions and music that are being released are mostly created using MIDI instruments and sound libraries. Nonetheless, the most successful formula for a hit is to combine programmed sounds and synths with live audio recordings. Here are a list of reasons why this happens:
- Capturing and preserving performances: audio recording allows a musician or a singer to capture their live performances and bring their emotion and musicality to the song. MIDI instruments and sound libraries lack emotions so being able to have a live performance on your production will increase the connection with the song and the listeners.
- Creating high-quality recordings: sound libraries and synths have been evolving exponentially in the past few years. In today’s marketplace, any instrument can be found as a sound library. Keep in mind that being able to record your own live instruments will improve the overall sound of the production creating high-quality recordings.
- Collaborating with other artists: audio recording technology has made it easier for artists to collaborate despite their location. By sharing audio recordings, artists can work on a song together from any part of the world.
Setting up your recording session in Ableton Live
Before starting a recording session in Ableton Live, it’s important to properly set up your project so the session runs smoothly and with the best quality possible. Follow these steps to set up your Ableton project correctly:
- Launch Ableton Live: Double-click the Ableton Live icon to open the software.
- Create a new project: Click on “File” and then select “New Live Set” or use the shortcut key “Ctrl+N” (Windows) or “Command+N” (Mac) to create a new project.
- Choose the audio interface: In Ableton Live, go to “Options” and select “Preferences” (or use the shortcut key “Ctrl+comma” (Windows) or “Command+comma” (Mac)). Under the “Audio” tab, select your audio interface from the dropdown menu.
- Choose sample rate: before starting any recording, it’s very important to set up the correct sample rate on your session so all recordings sound well. Under the “Audio” tab, make sure that the Sample Rate that appears is the same one that your audio interface is set at.
- Choosing the right buffer size: in order to have a smooth recording session, it is very important for the performer to be able to monitor itself perfectly. Buffer size allows you to control the latency of your session. In order to have the lowest latency in your recording, choose 128 or 256 from the dropdown menu in the “Audio” tab.
Choosing inputs in Ableton Live
After we have set up the audio interface and the project session, it’s time to choose the inputs we are going to use for the recording. Every audio interface has different types of inputs and outputs but they all share the same characteristics. Here are the most common types of inputs:
- MIC inputs: these are the main inputs of an audio interface. You can connect a microphone or a direct box via an XLR cable.
- Hi-Z inputs: these inputs are also known as high impedance inputs. They are meant for connecting electric guitars or electric basses via ¼” inch cable. Instruments with a low output volume such as electric guitars and basses can connect directly to the audio interface without having to use a direct box or an amplifier to boost the signal.
- Analog inputs: almost every audio interface has the possibility to extend their inputs via analog gear. Protocols like ADAT or S/PDIF allow you to connect external mic preamps to your audio interface so you can have many more audio inputs when recording a session.
Now that we know the main types of inputs that an audio interface might have, let’s assign those inputs into a project in Ableton Live. In order to do that, follow these steps:
- Create a new audio track by clicking on the “Create” and then “Insert Audio Track”.
- Go to the track header and open the dropdown menu below “Ext. In”.
- Select the desired input for your track. If your inputs don’t appear, select “Configure” to set up the inputs properly.
- Once you have selected the input, adjust the input gain on your audio interface to make sure the proper level of signal is getting into Ableton. Check the incoming signal by looking at the input level meter in the track header.
- Arm the track for recording. Now, you should be able to press record and start your recording session.

Monitoring in Ableton Live
When recording in Ableton Live, it is very important to have a good monitoring environment. Here are a list of all types of monitoring options that Ableton Live offers and the ways that they are used:
- Off: this deactivates the monitoring of the input signal. When the “Off” button is selected, you will only be able to hear the recorded audio when playing back after recording it. This option is often used when there is a big amount of latency happening and your audio interface has the option to monitor the input signal without getting into Ableton Live.
- Auto: this option automatically switches between input monitoring and playback monitoring. If the play button is pressed, it will monitor the recorded signal. If the recorded button is pressed, it will monitor the input signal coming from the interface. This is the most useful monitoring option.
- In: this setting monitors only the input signal. It doesn’t matter if you are recording or you are playing back a previous recording, only the input signal from the audio interface will be monitored.
- “Auto” and “off” (delay compensation): these settings are the same that we’ve mentioned above but with compensation for the delay that plug-ins or effect racks might cause.
You can switch between the different monitoring options in Ableton Live by clicking on the “monitoring” buttons in the track’s header.
How to record audio in Ableton Live
Let’s sum up all these previous steps and tips to one unique list. Here is how you can record audio in Ableton Live:
- First, open Ableton Live and create a new project.
- Go to “Live”, “Preferences” and under the “Audio” tab, select your audio interface, set your buffer size and check the sample rate.
- Connect your instrument to your audio interface via MIC or HI-Z inputs.
- Create a new audio track by going to “Create” and then select “Insert Audio Track”.
- Choose the input that you want to use from your audio interface in the dropdown menu in the track header.
- Arm the audio track by pressing the record button on the track header.
- Set the correct gain level for your recording. Make sure it’s not too low or too high.
- Choose your monitoring option in the track header and check that the signal is getting into Ableton Live properly.
- Press record and start your recording session.
By following these steps, you can now record instruments or vocals in Ableton Live and have a professional recording session. If you don’t have a professional studio, to sum up we are giving you some tips on how to improve the quality of your audio recording.
How to improve the quality of an audio recording?
Not everyone can afford the requirements that a professional studio requirements, so in order to improve the quality of an audio recording from your home studio, we are giving you some tips to keep in mind:
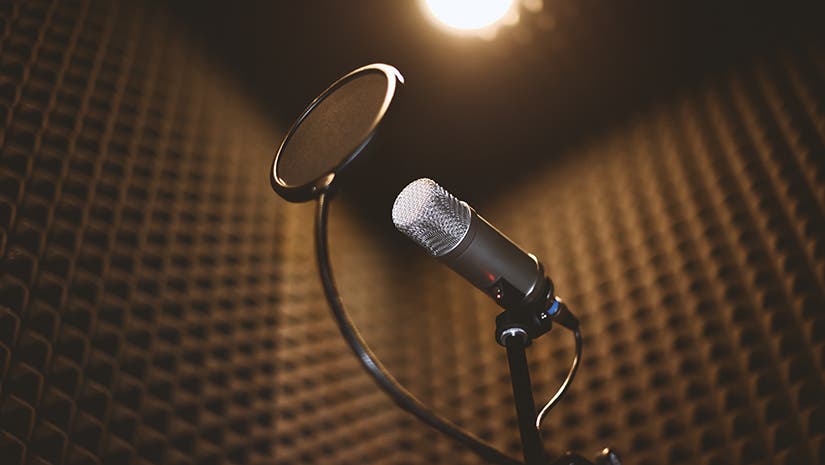
- Use a high-quality microphone: in today’s market, we can find a wide variety of microphones that range in prices and quality. If you have a quite isolated studio, we’ll recommend you to go for a condenser microphone. There are some great options starting at 150-200$ and it will definitely improve your audio recordings. If you are a drummer or you need to record percussion and loud sounds, we recommend you to go for a standard dynamic microphone. You can find a good one for under 100$.
- Control the environment: the environment in which you record is very important. Try to record in a quiet space with very little background noise. If you can afford it, try improving your room acoustics by adding acoustic panels or other materials, some of them are very cheap and effective like egg cartons.
- Adjust the microphone placement: the placement of your microphone from your source is very important. Try to spend some time looking for the sweet spot where the microphone can capture the best sound possible. Watch out for the proximity effect, don’t bring the microphone too close to the source.
- Use a preamp: a preamp is the device responsible for amplifying the signal from your microphone in order to get the right input level in Ableton Live. The better the preamp, the cleanest sound you will have. Sometimes, cheap interfaces add background noise. If you can, always try an audio interface before buying it.
- Edit your recording: it might sound silly but many audio recordings sound great because of the editing that’s done afterwards. There are plug-ins that can remove clicks, background noise and eliminate weird resonances on your sound. If you can not improve your recording in any other way, try to learn how to fix the recorded signal afterwards.
- Ground noise: if you record an electric guitar or bass via the Hi-Z input or a very sensitive microphone like a tube microphone, be aware of ground noises and AC noises. This type of noise is like a white noise that happens because of a ground loop in your power circuit. Try to turn off power-demanding devices such as air conditioners or guitar amps or keyboards.
By following these tips, you should be able to record any musician in Ableton Live and create a professional-sounding track. If you want to learn more about Ableton Live and its features, go check out Mel Uye-Parker’s Masterclass: Ableton Live 11 Video Manual Ableton with Certified Trainer Mel Uye-Parker


 50 Industry Music Production Tips You Must Know


