
Are you starting to produce tracks with Ableton Live? A correct configuration of Live will save you a lot of headaches during the creative process. Therefore, before we continue if you have never opened up Ableton Live before we suggest some preparation, this full guided masterclass with certified Ableton Live certified trainer showing all her tips so that you get a more fluid workflow from the beginning, so let’s get started!
1 – Calibrate your MIDI and audio latency
Does the program take time to start capturing what you record? Then you have a latency problem. This can happen due to the configuration of your computer and/or your sound card.
If you can’t fix it using a higher quality sound card, an alternative could be to calibrate your controllers and audio settings from the DAW.
This is essential to get fast, accurate results to fit your initial idea while recording audio through your interface or introducing MIDI notes with your keyboard. If it’s not accurate, you will constantly have to be quantizing or manually adjusting your recordings.
Calculate the milliseconds it takes Live to start recording and add them to the “driver error compensation” option in the “audio” tab of the preferences menu.
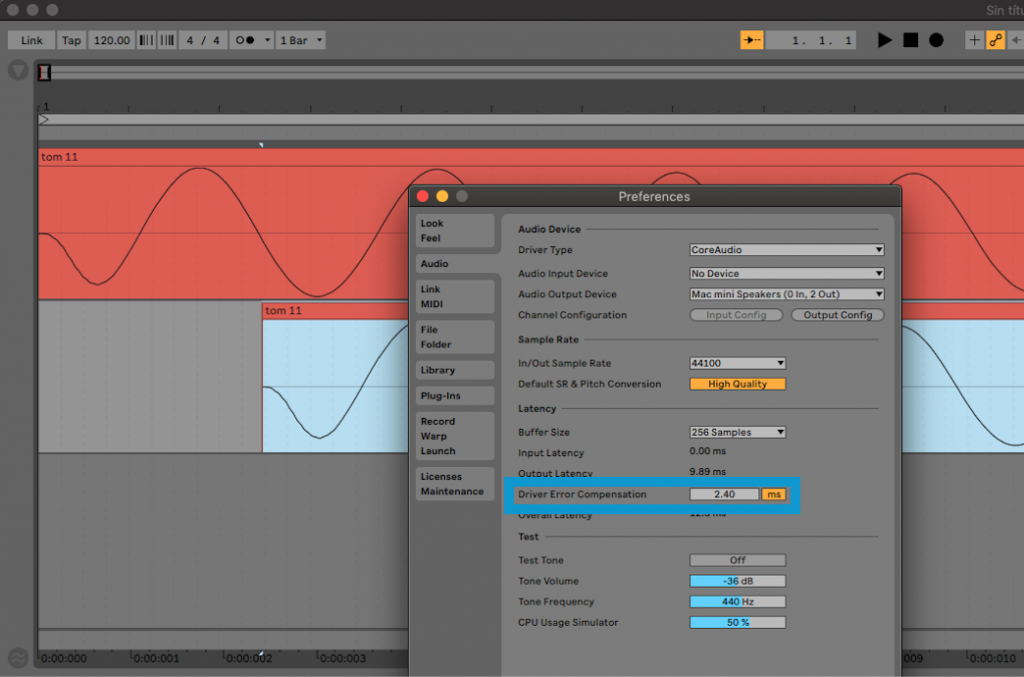
If you want to make a very precise adjustment you can follow the help instructions that are included in Live. To find them, go to the “View” menu, and click on “help view”. A column with several lessons will appear on the right. Click on “show all built-in lessons” and then on “driver error compensation”. Once there, you can start the tutorial that Live suggests to make a very precise adjustment of your latency.
2 – Set your buffer size in audio preferences
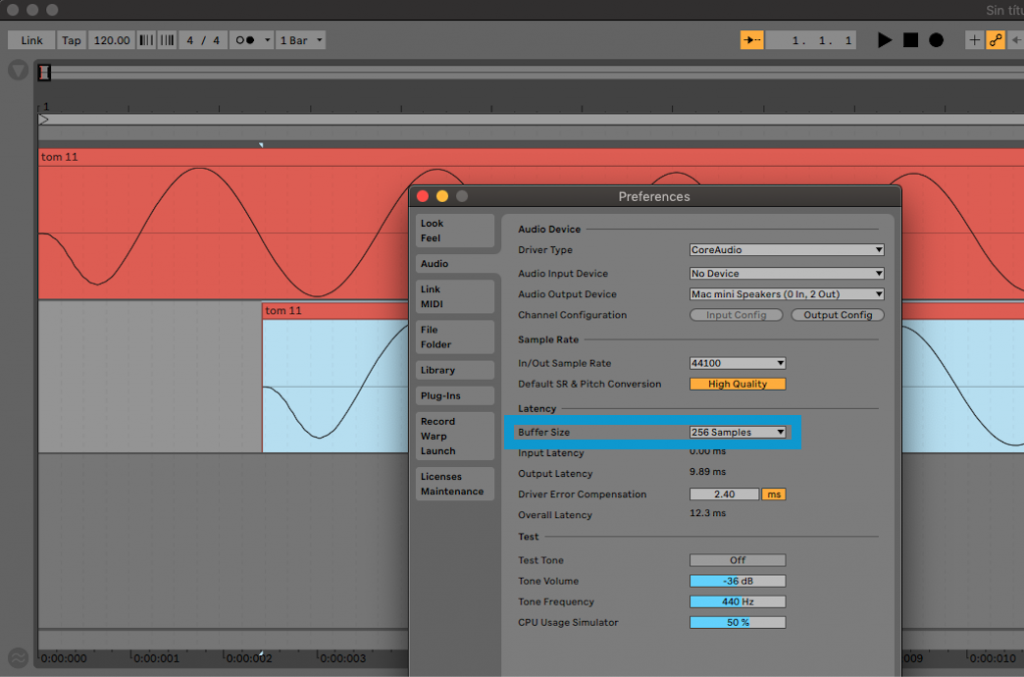
Another way to reduce latency is to increase the buffer size. If you work with a low number such as 256 samples, this means that Live has to process less information at the same time and therefore it’s faster when it comes to capturing your recordings.
However, when you have to play many tracks at the same time, Live will probably need a larger buffer size to be able to handle so much information at once. Therefore, in those cases you will have to increase it to 512 or even 1024 samples depending on your processor.
We understand that this isn’t an adjustment that you can leave prepared and forget about. But if you use this tool, you’ll save yourself a lot of anxiety (as we all know that Live can crash unexpectedly).
You can go fast when it comes to changing the buffer by using the shortcut Cmd +, on Mac or Ctrl +, on Windows, to access preferences. Then go to the Audio tab and select the appropriate buffer size.
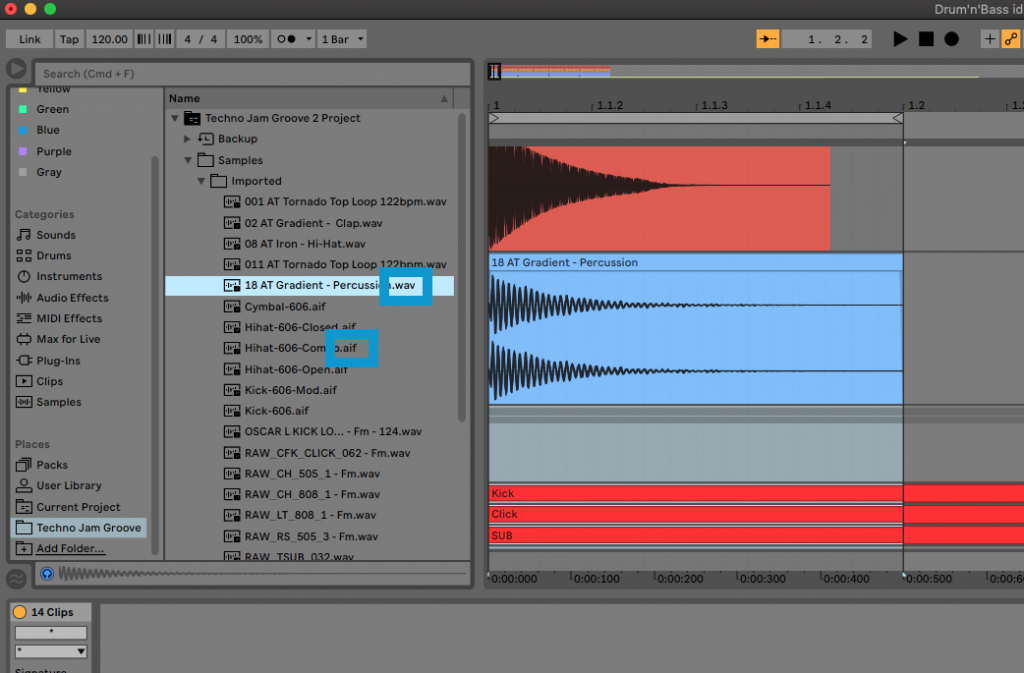
3 – Import elements from other projects
Are you going to start a new track inspired by one you’ve already finished? Or are you going to use settings that worked for you before but are in another project? This can save you a lot of time so you don’t have to search for or edit sounds that already worked well for you before or create melodic lines from scratch.
You have two options. You can merge two projects into one project, or you can just drag individual tracks from another project into your current workspace.
The first thing you’ll do is add the project you need into your library. Then in the browser, Click on “Add Folder” and choose the project you need.
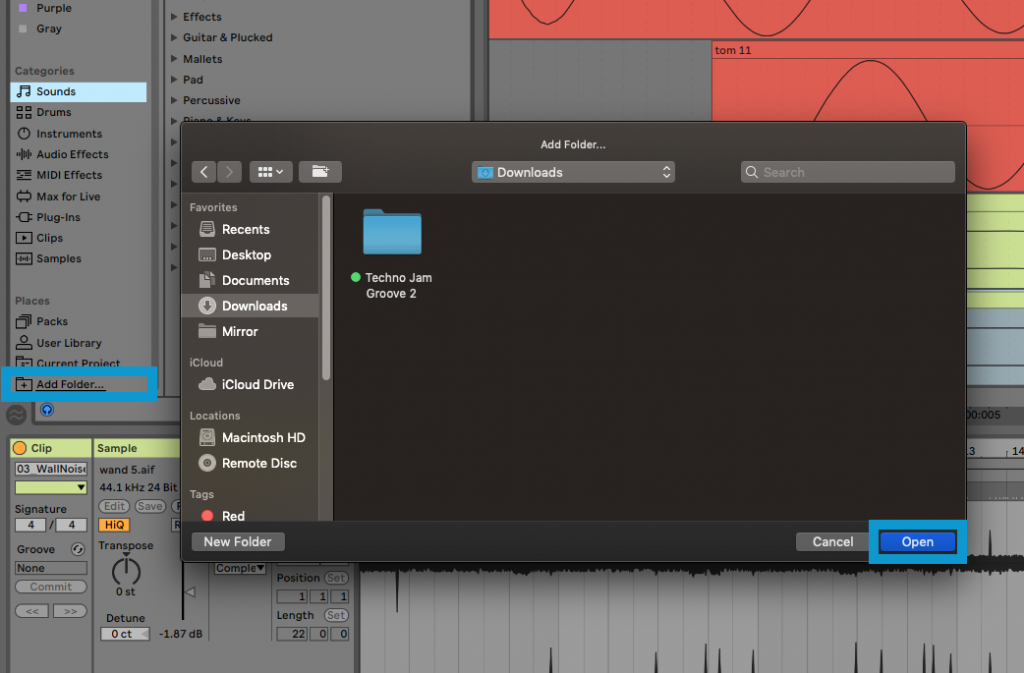
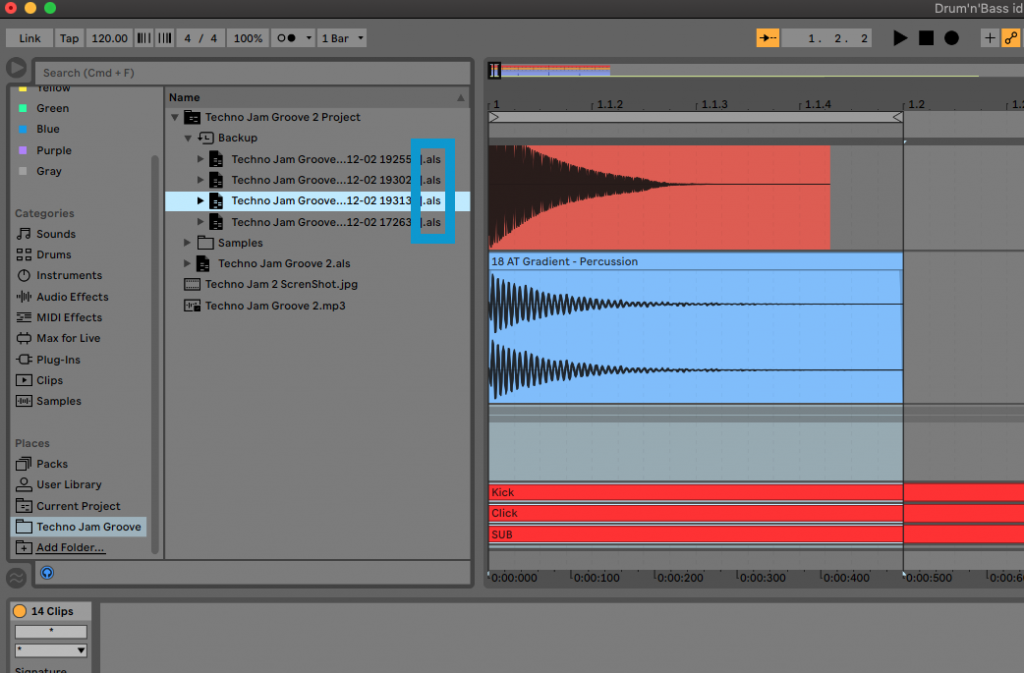
Then navigate to the desired project and find the right .als file. You can add the whole .als file if you want to add the whole project to your current one. Or you can just drag wav. and aif. files into your arrangement or session if you want to just add a few elements from that project.
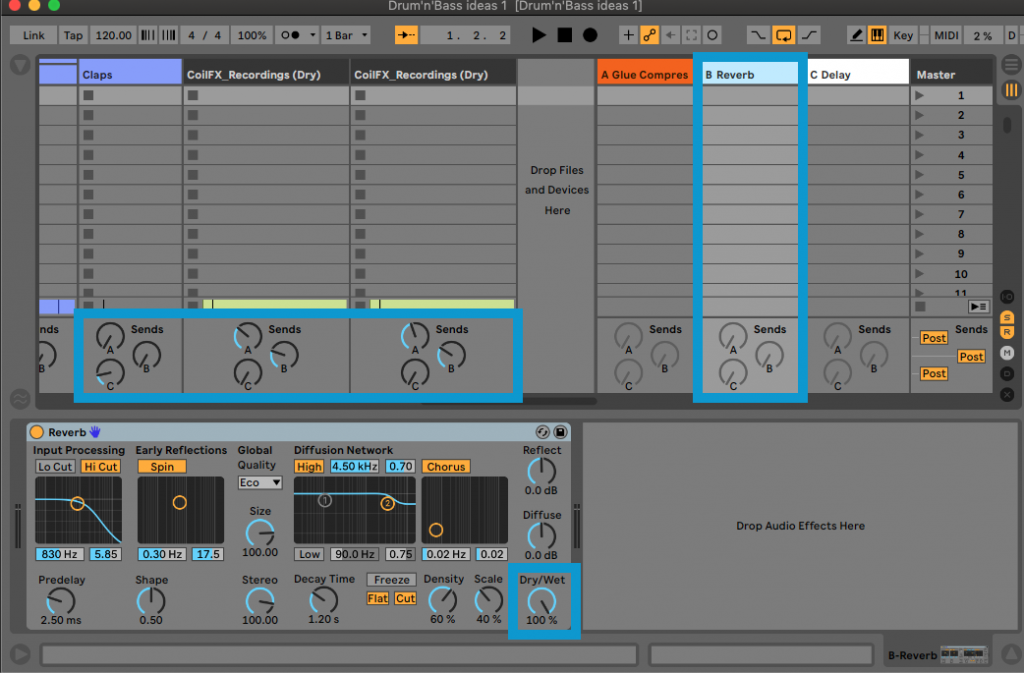
4 – Set the send and return channels from the beginning
Sometimes we start adding reverbs and other plugins that we usually use in every single track. Then we end up with a lot of wasted CPU and with effects applied in a not as homogeneous way as we would like.
Save yourself the headache by using return channels from the moment you start producing a new track. It is the most efficient way to use the effects without saturating your buffer and in such a way that they provide that essential human touch when creating spaces and dynamics.
Put an effect on a return channel and set its dry/wet or output level to 100%. Then you can adjust the amount it sends to your tracks with the “sends” knobs:
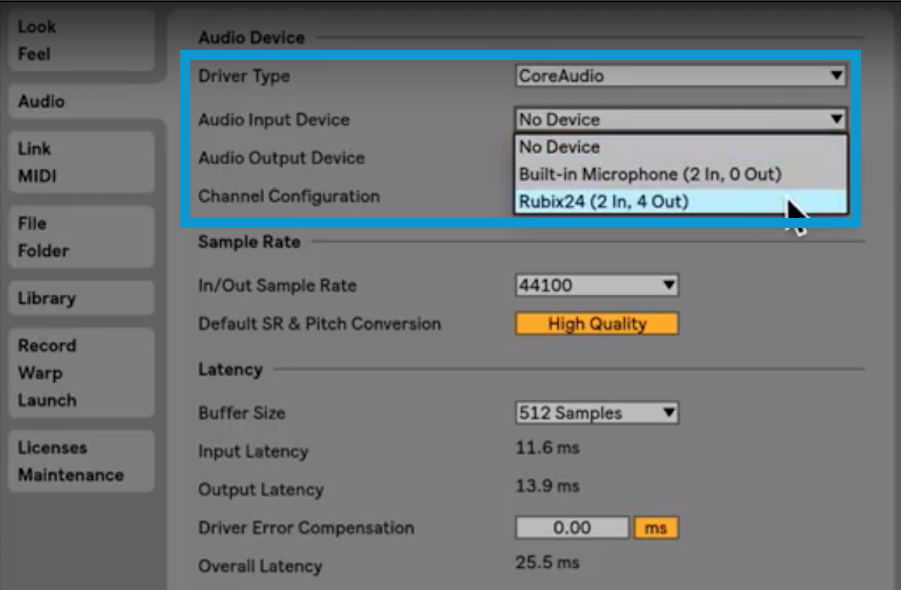
5 – Set your sound card and controllers
Nowadays, you connect a sound card or a MIDI controller to your computer via USB and magic! already works automatically.
However, if that is not the case, you need to know a few things. First, you must choose the sound card from preferences, in the Audio TAB, both in the Audio Input and in the Audio Output. If you use Mac you will surely have to choose the CoreAudio driver, and if you use Windows, the driver is usually ASIO.
Later, if you have an old controller, you will probably need to install drivers. These can often be downloaded from old archive pages on the website of the brand that made your hardware. And if you know for sure that it doesn’t need drivers, you can help Live to recognize it in the Link MIDI TAB, also in preferences:
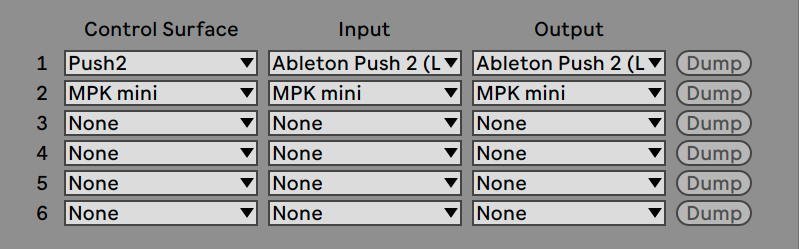
From there you can choose the controller from a long list that Live suggests.
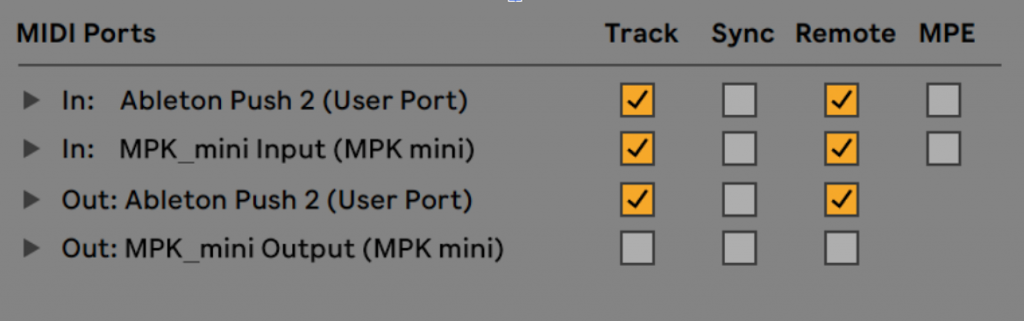
If your MIDI control surface is not listed in the Link/Tempo/MIDI Preferences’ Control Surface chooser, it can still be enabled for manual mapping in the MIDI Ports section of this tab:
6 – Add some macro controls you are going to use a lot
Are you going to use certain parameters a lot? If you know this beforehand, get them ready to be used in a more efficient way.
When you add instruments or effects to a rack, you can choose up to 8 controls throughout the entire chain to control on the front panel of the rack.
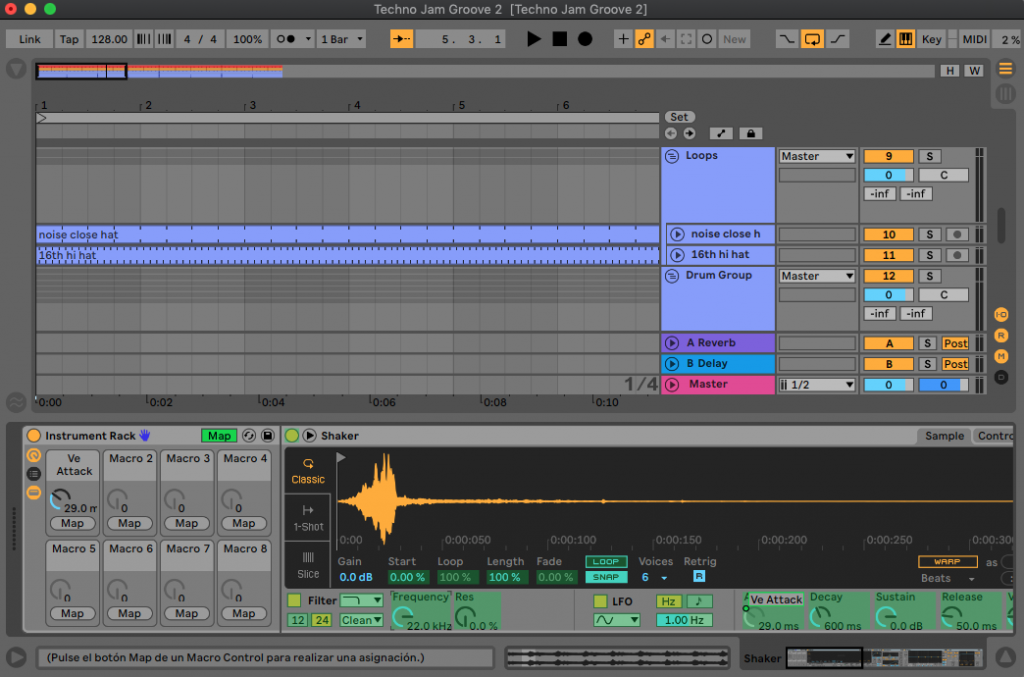
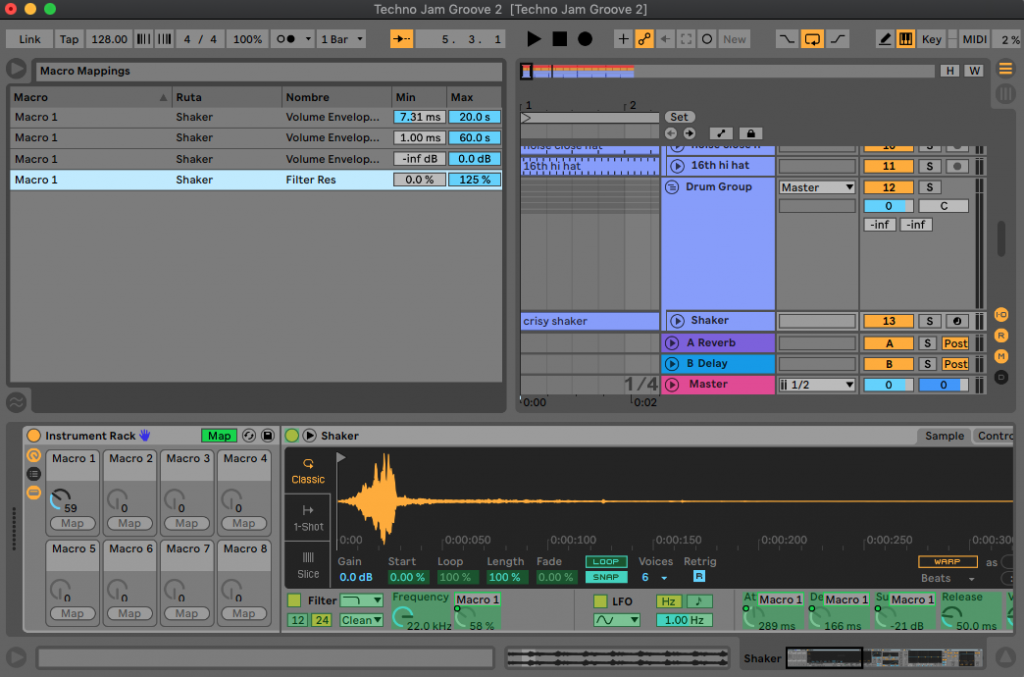
Click the ‘Map’ button pictured above and you can click on parameters throughout the rack, and set their minimum and maximum values for each control. Or you can just right click on a parameter and choose the macro you want to send it to: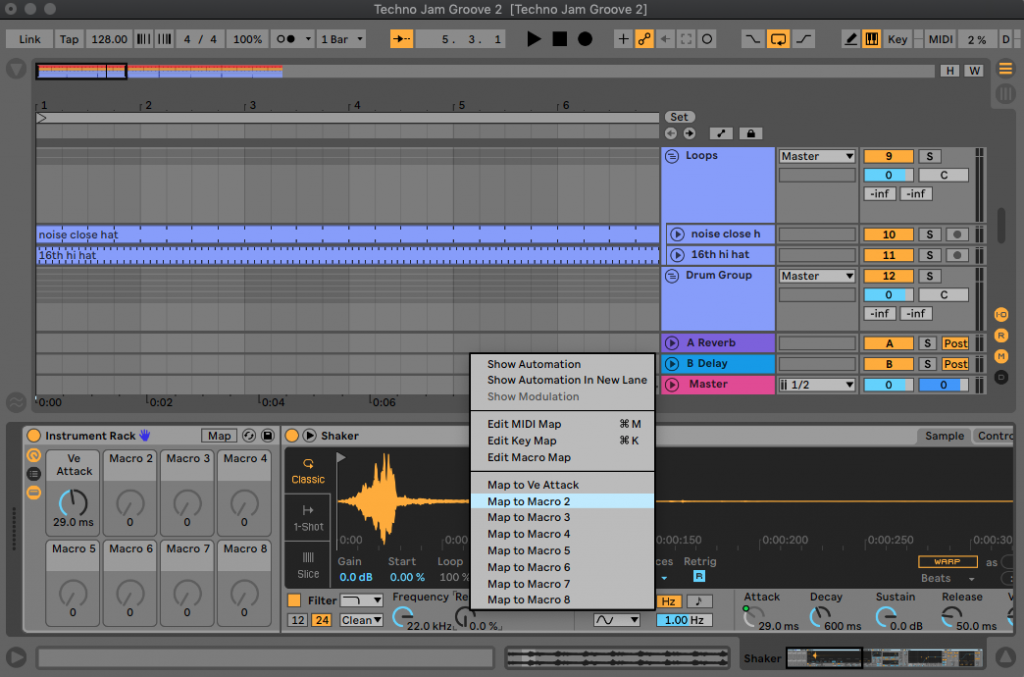
You can also map multiple controls to the same macro knob, allowing one knob to control a variety of FX.
Save these racks with macros in your library (just name them and drag them in) and you will have them ready anytime you need them!
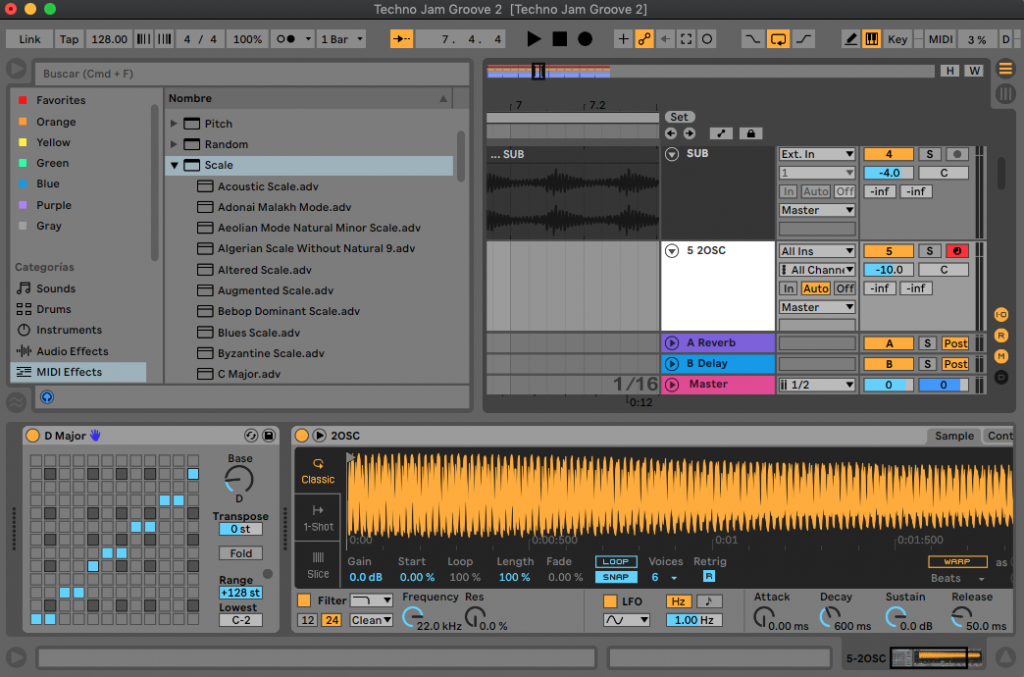
7 – Get your song key ready
If you already know what key to use to compose your new track, set Live’s native MIDI plugin “scale” to go faster creating your melodies.
‘Scale’ allows you to only ever play in a specific key. The Note Matrix determines input notes vs output notes, allowing you to strictly stick to one key if desired.
Give it a try – drag the scale preset you need (normally the Major or the Minor are enough when producing electronic music) and then adjust it to the key you need. You can’t go wrong playing any note!
8: Save Current Set as Default
Do you want to have your own template always on when you open a new project? Then make sure to save it as a default template.
Simply set everything up to the way you want it to be, and head to the Preferences and click the ‘File Folder’ tab. At the top, you’ll see the ‘Save Current Set as Default’ option. Hit ‘Save’, close Live and re-open it – you’ll have everything back the way you like it.
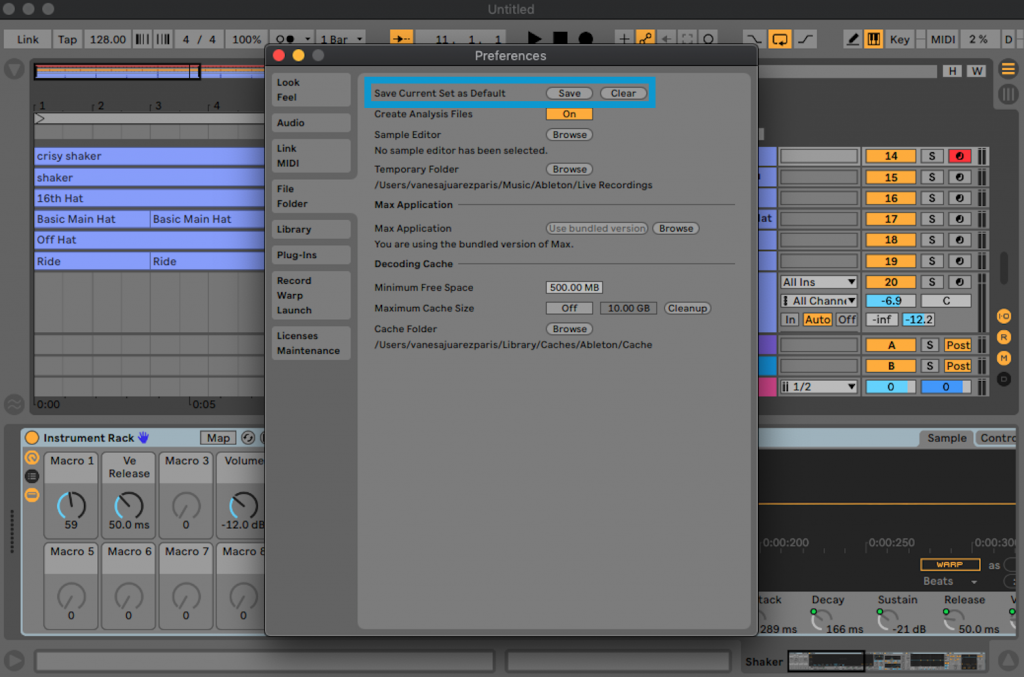
As of live 11, you can also save multiple templates by selecting them from the ‘Templates’ pane on the browser when starting a new session. Great if you have different starting points for different styles etc.


 50 Industry Music Production Tips You Must Know


