
One of the most difficult stages of music production is doing a correct mix. However, a lot of problems come from overlooking one crucial step in the mixing process. One step that, at simple sight, may seem too simple and easy to do in order to remove it from your to-do list.
We are talking about gain staging. And don’t deceive yourself, it is a critical process that can take your mix to the next level. In this article we will show you some easy steps to follow to perform this process to its fullest and, therefore, maximize the quality of your mix.
before we continue don’t forget to check out this free masterclass chapter on UK producer TÁLÁ using Gainstation2 the effects plug in which will make your mix instantly better
Levels, Gain and Volume
Mixing is the art of balancing the relative levels of your Clips, Tracks, effects and Master output. However, what do we mean by levels?
The term level refers to the amount of electrical current entering or exiting a circuit. The word does not imply a boost or attenuation, so we need to have a look at more specific terms.
The term volume refers to an audible increase or decrease in apparent loudness of something you can hear, rather than an electronic or digital level adjustment.
The term gain, on the other hand, refers to the boost or reduction of an incoming signal. It is the ratio of an amplifier. This is why we call the process of leveling the mix “gain staging”.
It is entirely possible to increase a signal’s internal gain while maintaining a consistent volume in your speakers, just as it is possible to increase the volume coming out of an amplifier without increasing the input gain. Therefore, volume and gain are two terms that are related but are not the same.
 Now, when working in your DAW and with digital audio, it is easy to think that adding or removing gain amounts with any knob or slider is fine. The internal high-resolution processing of the DAW won’t probably let you clip individual track outputs, even if you set them at +6.
However, you must leave a correct amount of headroom in order to be able to master the track properly later on. And that cannot be achieved by just turning the Master track volume slider down. You must take care of the levels of gain of every single audio clip and plugin in your mix, one by one, in order to get a perfect balance between all your track elements always keeping the Master track volume slider at 0 dB.
Let’s have a look at the work flow that will help you achieve that. Of course, it is not the only way to do it, but it is the logical way to manage gain stages to maximize sonic quality:
Steps for Setting the Levels
One thing you must keep in mind is that every gain change you make affects every other gain stage that occurs after it. And by gain change, we mean every gain and volume slider you adjust, including clips and plugins.
Therefore, since having to adjust so many elements can be a bit overwhelming, it is important that you do it in a specific order:
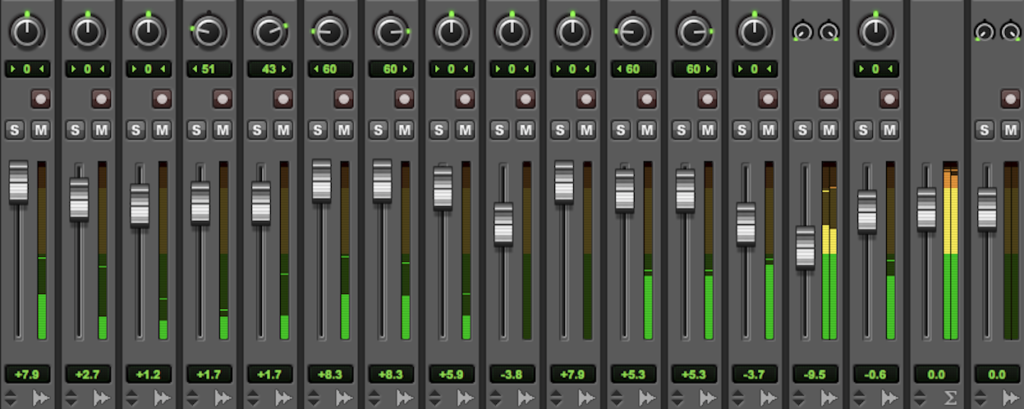
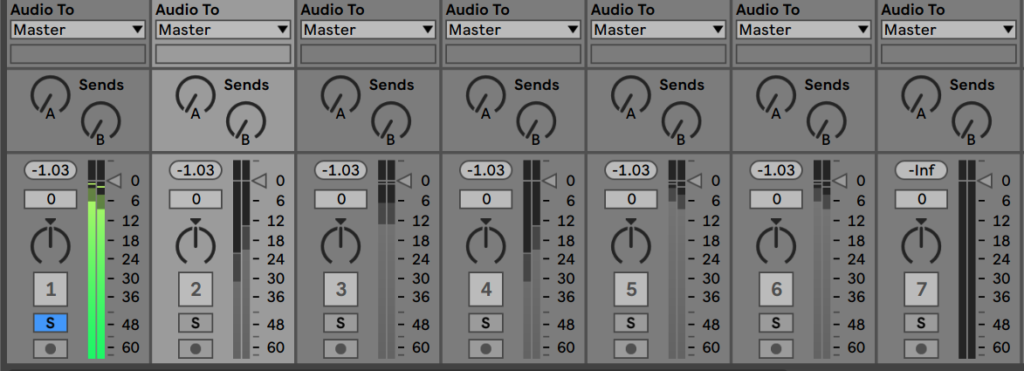
1 – Set all track volume sliders to 0dB, including the Master Volume one.

2 – Disable all plug-ins.
This can be a bit of a burden in some DAWs, as it is the case with Ableton Live, which doesn’t have a shortcut or fast way to do it. However, in Logic Pro X, it can be done in just a moment. In other DAWs, search in the manual to find out.
How to disable all plugins in Logic Pro X
3 – Solo the first track.
We are going to be working with a track at a time, starting with the first one. We will solo it and proceed with step 4.
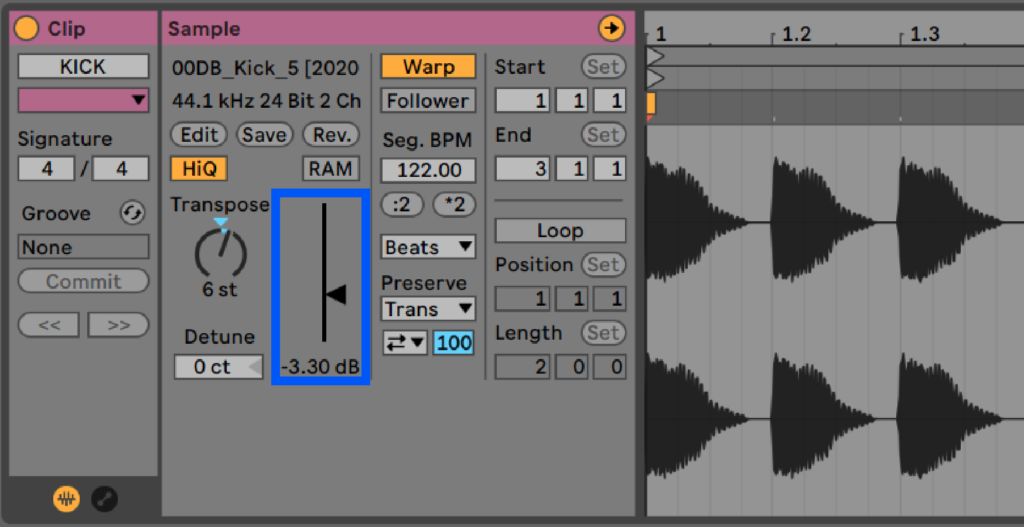
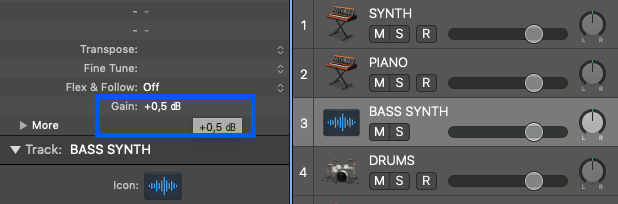
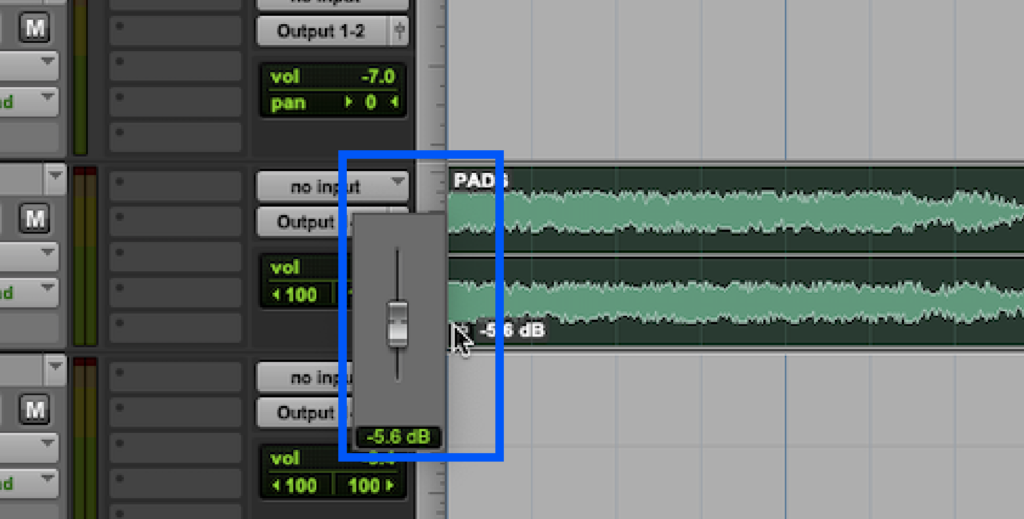
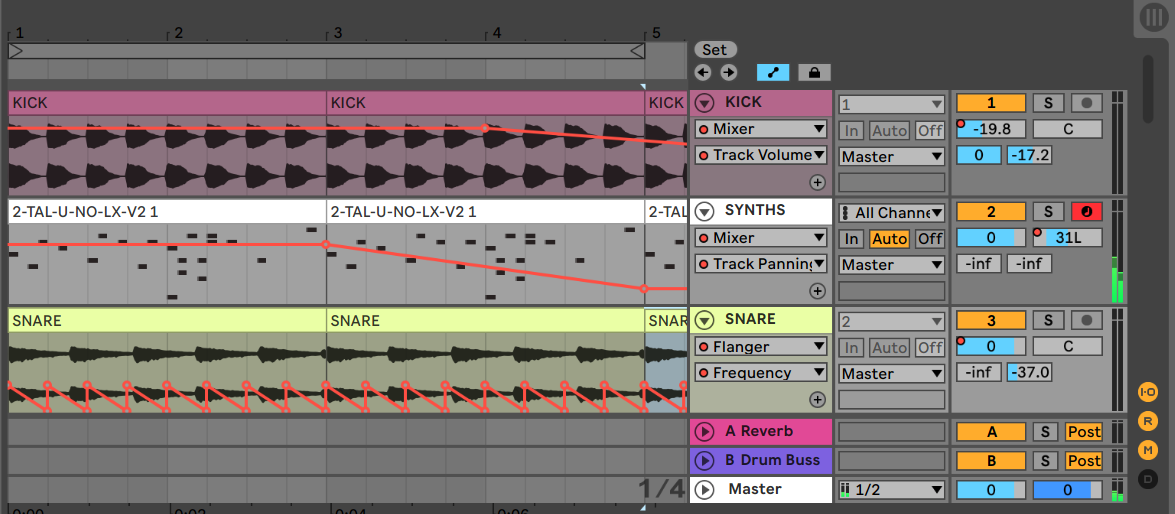
4 – Set the clip gain or instrument output of the track we just put in solo, so the next plugin in the chain (or the volume slider of the track if there isn’t any plugins) doesn’t clip.
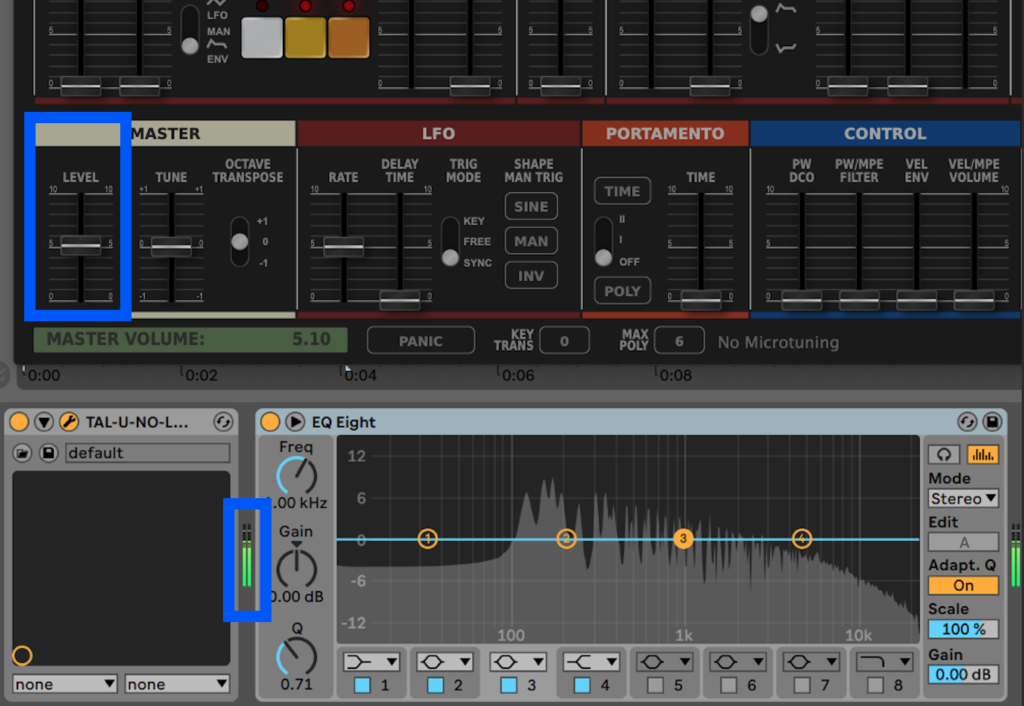
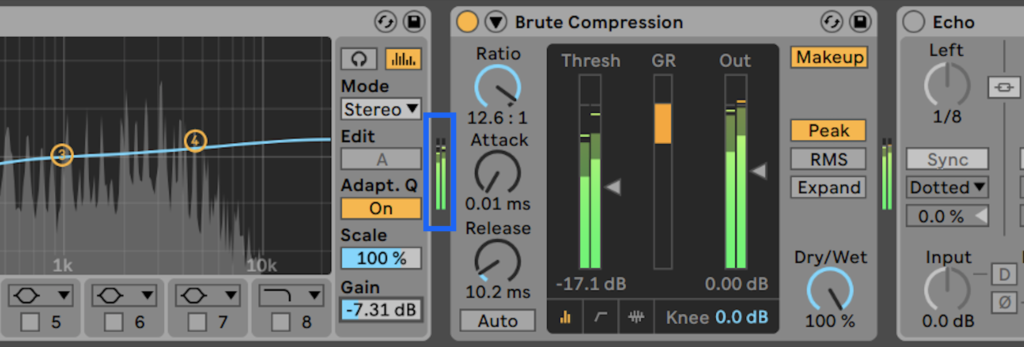
5 – No plugin in the track chain can clip either. Enable one by one, from left to right, adjusting their gain levels.

6 – Repeat step 3-5 with all tracks, also the bus and group tracks.
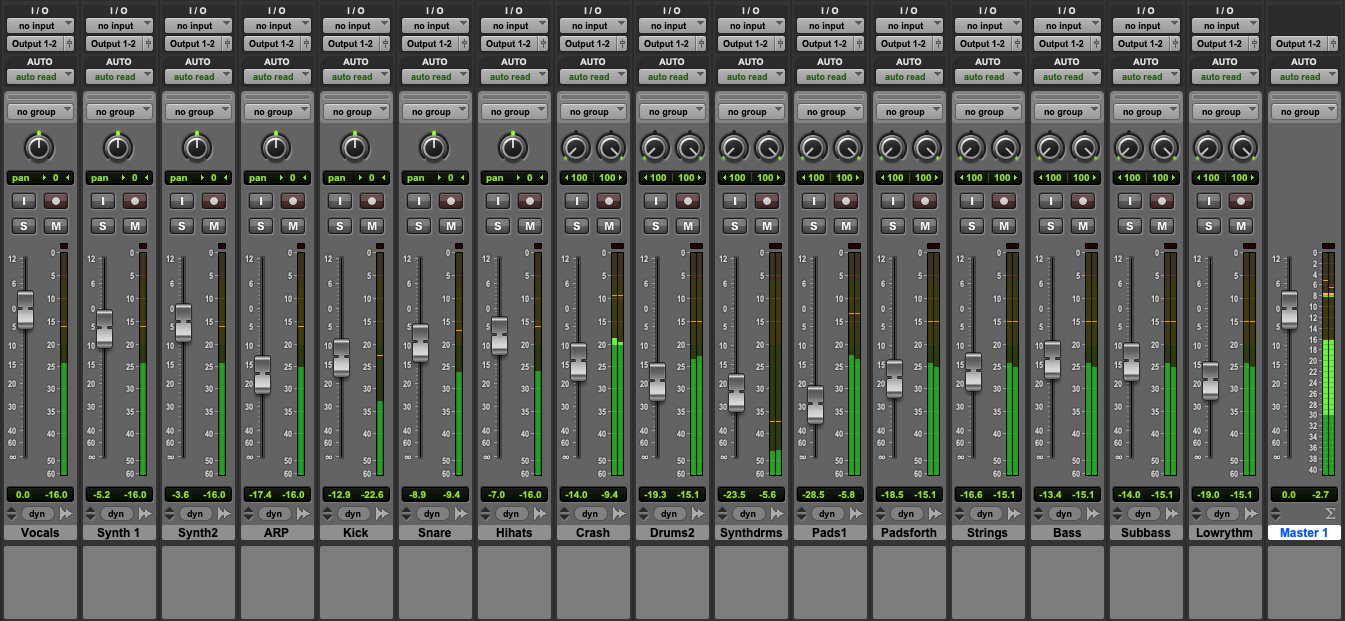
7 – Manage the combined volume of your individual tracks (using the volume sliders).
At this stage, aim to have the Master level at around -15dB.
8 – Fix all the mix automations (volume, panning, effects…).
still confused about panning? this masterclass covers everything you need to know about panning and creating space in your mix
9 – Revise all plugins in your Master track, if you may have any, as you did in steps 3-5.
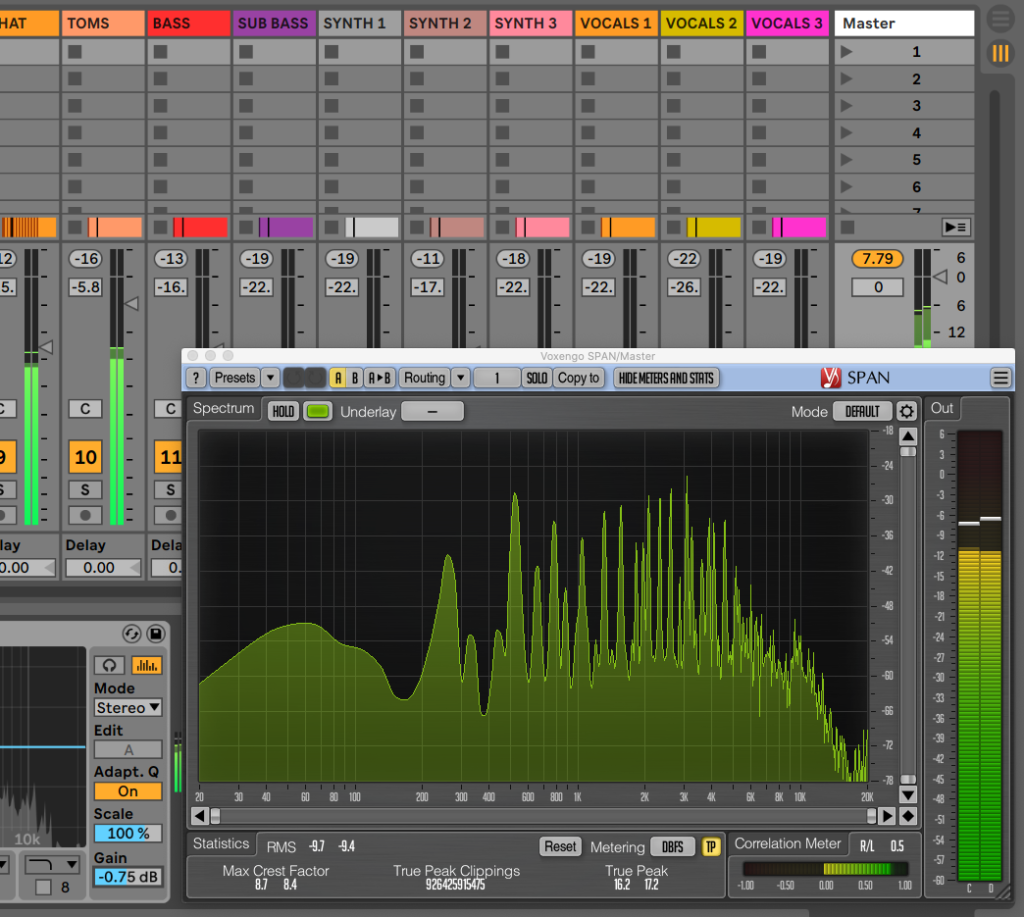
10 – Adjust the last plugin before the output of the Master track so the highest peaks are between -6 to -3 dB.
Get an accurate reading with a meter plugin such as Voxengo’s SPAN (free).


 50 Industry Music Production Tips You Must Know


