
You’re finally making some decent tracks and starting to feel like sending those out to labels for release, or maybe just to play them out on your dj mixes or even shows. When you compare them to other comercial tracks though, you feel like yours are lacking some loudness and fall a bit behind. What to do then?
There are a few options available.You could hire a mastering engineer to give the final treatment to your track. You could also try one of the online mastering options in the market, we reviewed 6 of them on the blog a few months ago.

But if you think about it, spending money every time you want to try a new track or send a demo, knowing you might want to make some changes to it afterwards, might not be the best idea.
Mastering is not an easy task, it requires a high level of expertise to make decisions and it also requires that you have a properly treated room in terms of acoustics so you can make those good decisions. So when it comes to getting your final master, the one that will be released commercially, we strongly recommend you to trust an experienced engineer for the job.
If you still want to go deep into mastering and learn your craft, that’s great. We encourage you to start with the Masterclass we shot with the amazing Robert Babicz, an outstanding engineer with decades of experience that will show you all the tricks and secrets behind analog mastering.
However, if you want to test your tracks out or send them to labels without spending too much money, there are a few steps you can take to achieve a quick, decent mastering on your own with good enough results for those purposes. And everything inside the box, without the need of external gear or expensive plugins.
Preparation before starting
Before diving deep into it, it’s important to remember that for the mastering process to make the best out of your music, the mixdown should be as good as you can make it. Any mixdown mistakes might be amplified by the mastering process, and the better your mix is, the easier it will be to get the mastering done, so take good care of that before jumping into this stage.
Also consider the level at which your mix is peaking. Somewhere between -6dB and -3dB should be fine, if you’re too loud or too quiet, bring the level of your channels up or down accordingly.

It would be nice to also use some reference tracks, so look for tracks that you know sound great and are similar to yours so they are helpful. You can listen to them, get in the mood and compare them to yours to find what are the differences between them. This will help you to make decisions with a goal in mind.
Keep in mind though, that these reference tracks are already mastered, so they are louder than yours, so compensate by lowering the volume until you feel them at around the same perceived level.
Before getting into the technical stuff, find the section of your track with the highest energy on it, and loop it. You should focus on that section while applying the following techniques.
We are going to do this in 3 simple steps, each one of them focusing on a different aspect of the mix: EQing for tonal balance, reducing the dynamics and getting loudness.
1. EQing for tonal balance
The idea here is to make subtle adjustments in order to remove any unwanted or unnecessary frequencies and improve the overall tonal balance of your mix.
What should you use here? A surgical, versatile and clean EQ like Fabfilter’s Pro-Q, Logic’s Channel EQ or Ableton’s EQ 8.
First, let’s roll off a bit of the lowend. It might not be necessary depending on how you have been controlling the low frequencies during the mixdown, but it’s definitely worth checking it out. Start around 25 Hz and slowly go up. If you start noticing that the energy of your sub is falling apart, then back it down a little. Listen to your reference tracks to know when to stop.

It’s important that you don’t overdo it, as this would lead to your track being too thin and lacking power. But it is also important to remove the unwanted frequencies on the sub, since those take a lot of energy and will restrain you later on when you are approaching loudness.
Then, look for any muddyness in the low-mids or harshness in the high frequencies, and tame them with subtle EQ bells or dips. Usually no more than 2-3 dBs should be needed, maybe even less than that if your mixdown was already sounding nice and clear. Keep in mind we’re doing little adjustments here, the most important EQing should have been done during the mixdown stage.
Whenever you make cuts or dips, listen out for any loss of presence or buddy, on any elements, and if they happen, compensate with little EQ boosts on the necessary areas.
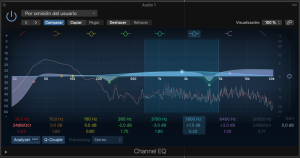
Finally, let’s focus on the high-end frequencies, above 10-12kHZ. You might want to bring them up a bit with a shelving EQ if you feel like your hi hats and other bright elements need to stand out a bit more when compared to the reference tracks.
For this kind of boosting, it might be a good idea to use a coloring type of EQ, such as Pultecs, Maag, APIs or any other plugin of this kind that you might have available. Whenever you have an overall tonal balance that is similar to the tracks you’re referencing to, move on to the next step.
2. Reducing dynamics with compression and soft clipping
Compression can be a very deep and complex topic, especially if we are talking about mastering. The approach we’re taking here is pretty simple, just getting a tiny bit of compression without messing up the mix in order to glue our elements together and make them sound more cohesive. After that, we will apply some soft clipping to shave the biggest transients, thus reducing the dynamic range and allowing us to get our master to sound way louder on the last step.
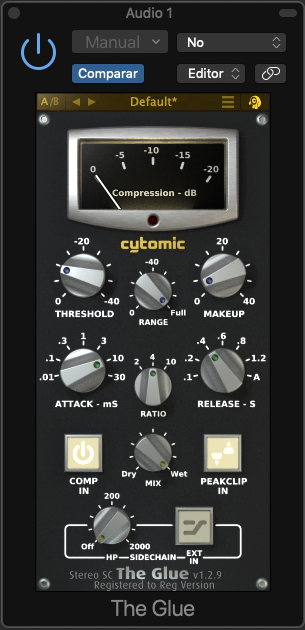
The tool we are going to use for this step is an Ableton stock effect that allows us to do both compression and soft clipping: Glue Compressor. If you’re not an Ableton Live user, you can also go for Cytomic’s The Glue, which is almost the same, although Logic’s Compressor can also get pretty similar results with its Vintage VCA mode.
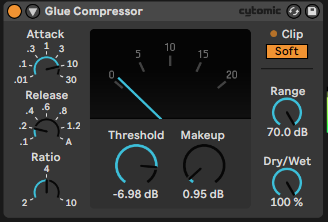
Let’s start with the compression stage. Our goal should be getting a gain reduction not bigger than 1 dB, something very subtle. FIrst, let’s drag the threshold down until we get a fairly noticeable compression, around 6-8 dB of reduction. This is only for getting the right times for attack and release.
If we get the attack too fast, the result will be too obvious, and the transients will be smashed, something that we definitely want to avoid. If we get it slower, the transients will all go through, it will add a bit of character, but if we overdo it the result will be too obvious too.
Same goes for release times. Something very short will get things pumping but with an obvious effect, while leaving a long release won’t be so noticeable but the result can become a bit dull.
There’s no exact right value for any of them, as it depends on a lot of things, so listen carefully and make changes accordingly.
Considering all this, we need to find the sweet spot, somewhere where it sounds natural enough, not too pumpy, not too smashed. Once you have set attack and release times, it is time to bring the threshold back up, until we get just a little bit of compression, around 1 dB.
If you struggle with this, or you’re not sure of what you are doing/hearing, it’s better just to skip this step and go straight for clipping than messing up the whole mix by doing it wrong.
After the compression, we want to trigger that clipping, so we need to bring the Make up volume up. Don’t overdo it, just crank it up until you see the red light turning on a bit. Then just press the ‘Soft Clip’ button and you’re good to go.
What we’re doing with soft clipping is shaving the transients, thus reducing the dynamic range, which will allow us to get our master even louder on the next stage.
Since we cranked the volume up for the soft clipping to happen on the Glue Compressor, now we should bring it back down a bit, to a level close to the one we had before the glue compressor. You can do that with a utility or gain effect.
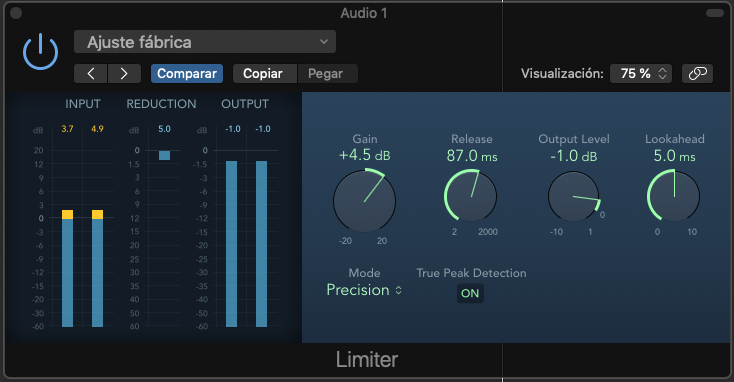
3. Getting things loud with limiting
For this last step, we are going to use limiting. You can use any limiter you have in your plugin collection, even stock plugins are good for the job, remember this is not going to be a final master but a demo. On this stage, we just want to get things as loud as we can without distorting or destroying the mix.
Load your limiter on your master channel, set the ceiling at -1dB. Then, start cranking up the gain. The tricky part here is when to stop. If you’re hearing distortion clearly, or if you feel like your track is sounding cluttered or unnatural, then you certainly are bringing it up too much.
Getting a 4 or 5 dB reduction here would be nice, but that will depend on how good of a job you did with your mixdown. There are some techniques combining two limiters with different settings that will allow you to get a lot of loudness, but we want to keep things simple in this post so everyone can have a try.
Once you find a point where it doesn’t sound too harsh or distorted, that’s it. You might think of comparing your loudness to the reference tracks, but that wouldn’t be a wise thing to do, since those tracks have probably been mastered by professional engineers, so you probably won’t be able to get your demo master to the same level of LUFs or RMS.
This is it. If you’re feeling like this is not working for you, maybe you need to revisit your mix, or maybe your ears aren’t still trained enough for this kind of task. Developing an ability to listen and hear these subtle and precise changes needs lots of hours of practice and listening sessions in properly treated environments – or a great set of headphones.
As we said before, this is only a demo, not a commercial, professional mastering process, and the final result will depend on the quality of your mixdown, the acoustics of your room and of course your experience, so don’t give up and keep working!


 50 Industry Music Production Tips You Must Know


